

Rotoclear S3 — Installation
Two versions. One clear view.
Adhesive or screw-on — here's exactly how the S3 goes onto your machine window, step by step. Official instruction manual: Operating manual (German | English, PDF) →
Adhesive version
The all-rounder — bonded to the window, no drilling
Typical applications
- Can be used on laminated safety glass (LSG) or polycarbonate (PC) windows
- Suitable for milling machines, lathes, and mill-turn centers (DIN EN 12417 and DIN EN ISO 23125)
No drilling required
Ideal for laminated safety glass — the window stays untouched.
Vertical installation
No need to remove the machine window for mounting.
No special staff
Easy and safe adhesive process — no specially trained staff required.
Everything in the kit
Adhesive flange, two-component adhesive, template, primer and tools included.
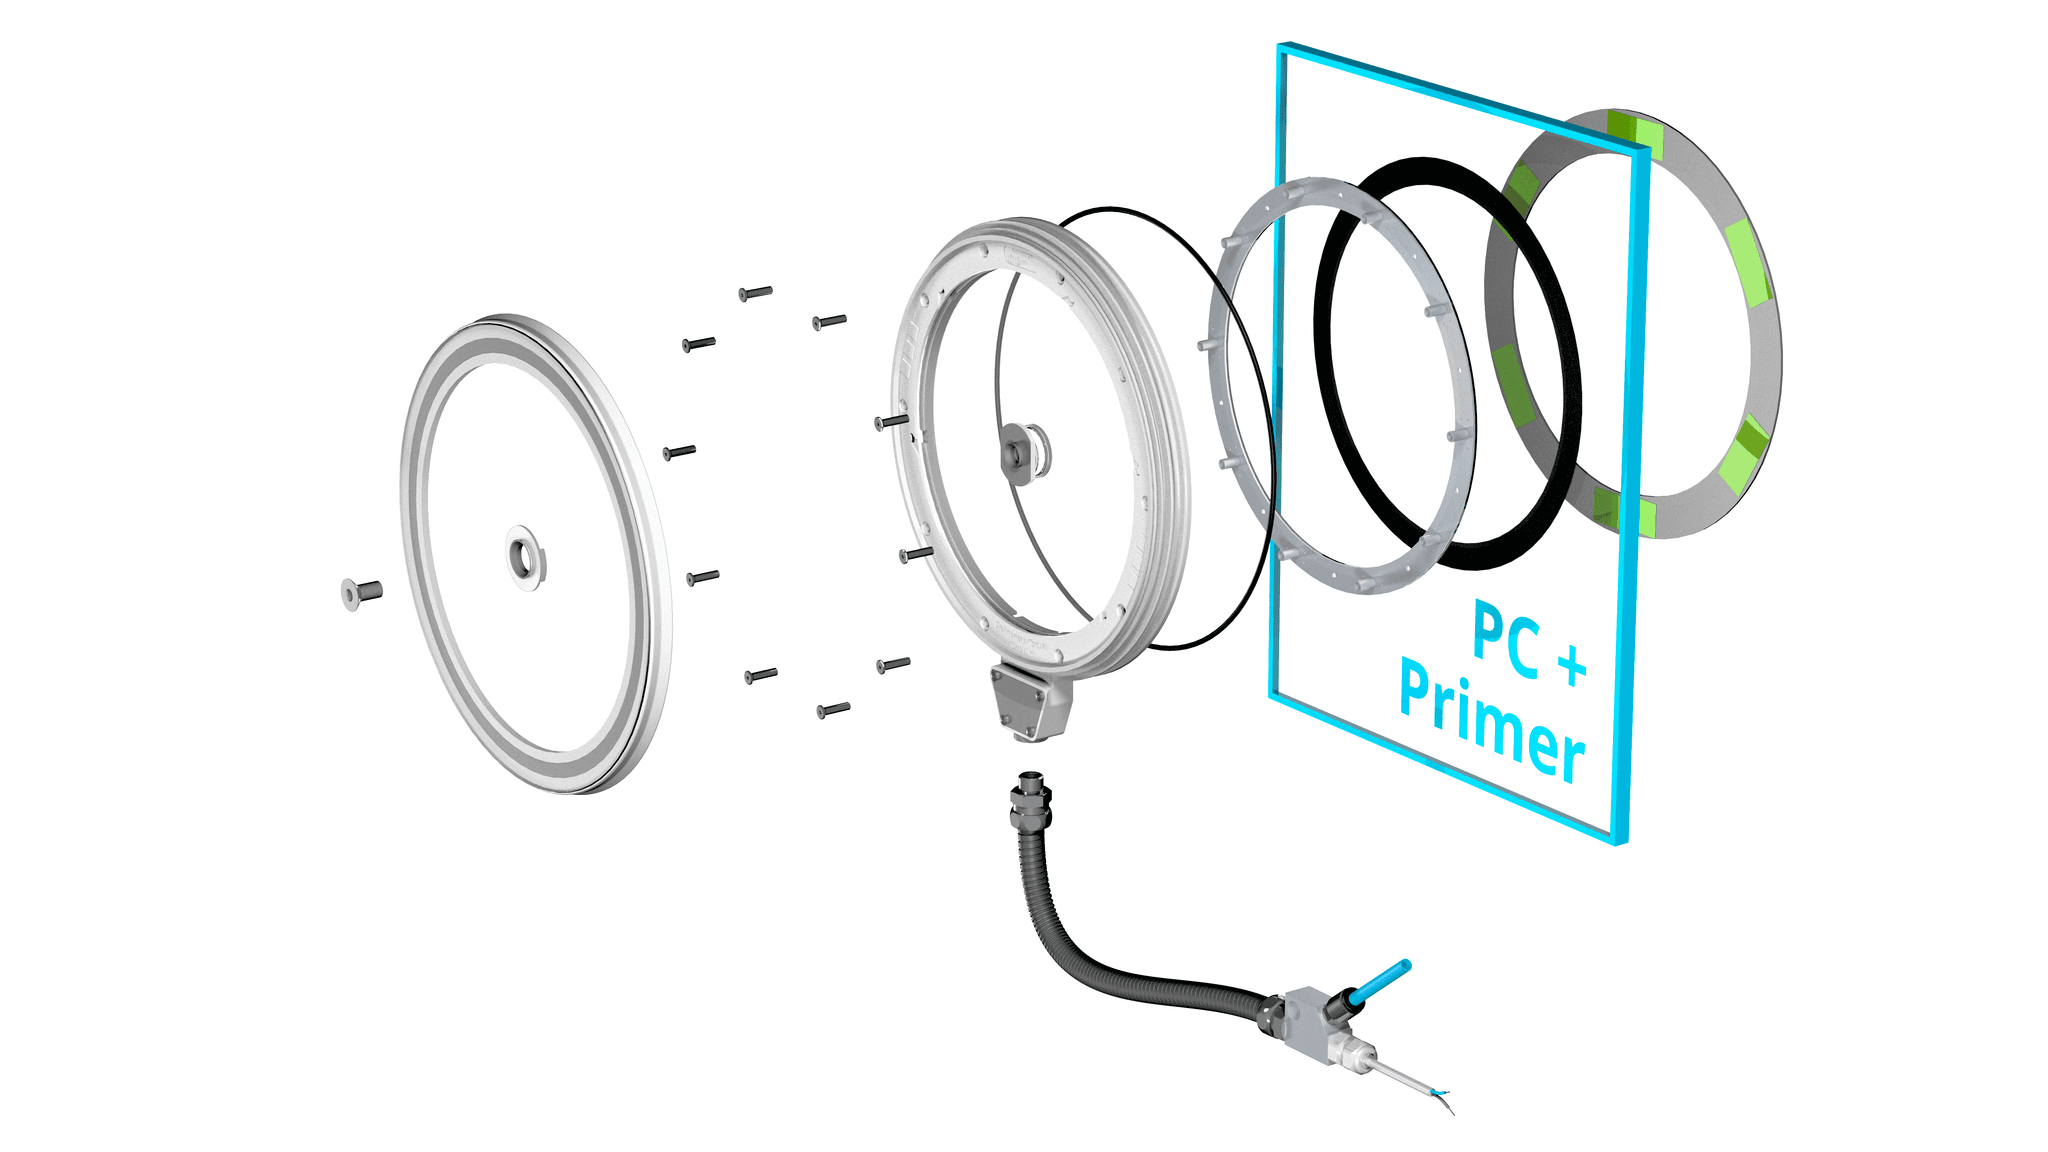
Installation steps
- 1Define the position and orientation of the Rotoclear S3 on the machine window
- 2Thoroughly clean and degrease the inside of the window
- 3Mark the exact position
- 4Apply adhesive template (polycarbonate only) and remove protective film from the ring area
- 5Apply primer (polycarbonate only) and allow to air-dry
- 6Remove adhesive template (polycarbonate only)
- 7Position and firmly press on the adhesive flange
- 8Fill adhesive pockets with two-component adhesive
- 9Allow adhesive to cure (approx. 6 h)
- 10Mount and screw on the stator of the Rotoclear S3
- 11Clean the outside and apply the cover
- 12Connect power and sealing air
Bonding on laminated safety glass (LSG) — no primer
Bonding on polycarbonate (PC) — with primer
Prefer not to DIY?
Our certified team installs on-site across the USA — including the adhesive cure-time management and window inspection.
Screw-on version
The cost-effective choice for drillable polycarbonate windows
Typical applications
- Suitable only if the machine window can be drilled into without problems
- Can be used exclusively on polycarbonate (PC) windows
- Designed only for milling machines
More cost-effective
Cheaper than the adhesive version.
No cure time
Mount and run — no 6-hour adhesive cure.
Vertical installation
No need to remove the machine window.
Everything in the kit
Screw flange, drilling template and fasteners included.
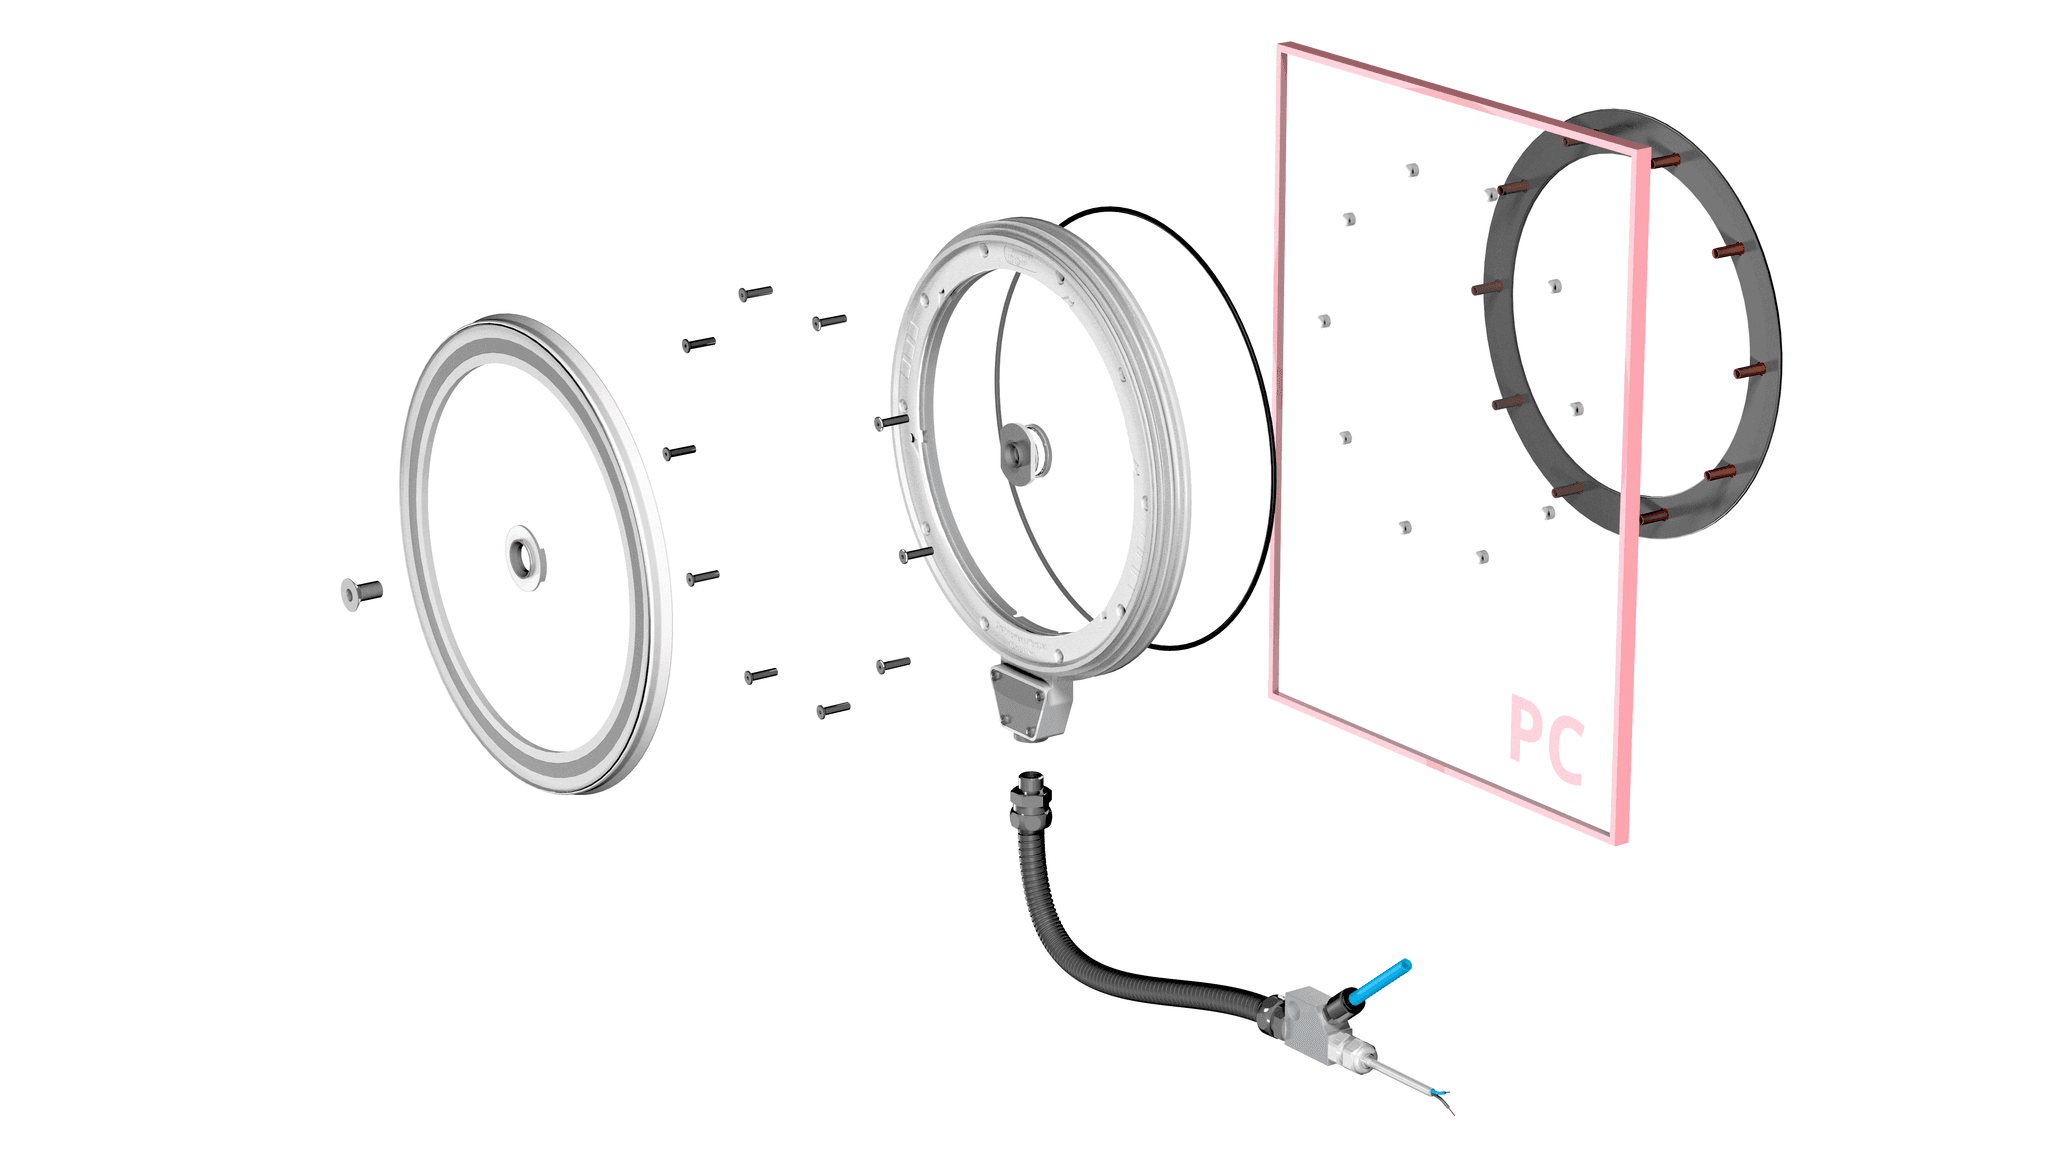
Installation steps
- 1Define the position and orientation of the Rotoclear S3 on the machine window
- 2Position and secure the drilling template on the outside of the machine window
- 3Drill the hole pattern into the polycarbonate window according to the template
- 4Thoroughly clean the inside of the machine window
- 5Insert the screw flange into the drilled holes from the outside
- 6Fasten the device on the inside
- 7Connect power and sealing air
Prefer not to DIY?
Our certified team installs on-site across the USA — including the drilling, mounting and window inspection.
Need parts for your S3?
Rotors, bonding kits, valves and more — configure exactly what you need and get a quote.
Spare-parts configurator →Questions during install?
Talk to our US Rotoclear team — we've done this on every machine brand.